The Best Homemade Vanilla Extract Recipe (Alcohol & Non-Alcohol)
Homemade vanilla extract is one of the EASIEST and most rewarding DIY projects you can try.
With just a few ingredients, you can create a rich, flavorful vanilla extract that beats store-bought every time and at a fraction of the cost!
Whether you want a classic alcohol-based extract or a non-alcoholic version, I’ve got you covered.
In this article, I’ll share my step-by-step recipes for both non-alcoholic and traditional(alcohol) vanilla extract.
Why Make Your Own Vanilla Extract?
Store-bought vanilla extract costs about $15–$25 for 4 oz or $3.75-$6.25 per ounce.
With this recipe, you’ll spend about $0.66 per ounce for the alcohol version and $0.61 per ounce for the non-alcohol version. That’s up to 80% cheaper!
To make it even better, by making your own, YOU control the ingredients and flavor intensity, which means no artificial additives or watered-down flavors.
Vanilla Extract Recipes
Alcohol-Based Vanilla Extract Recipe
Ingredients:
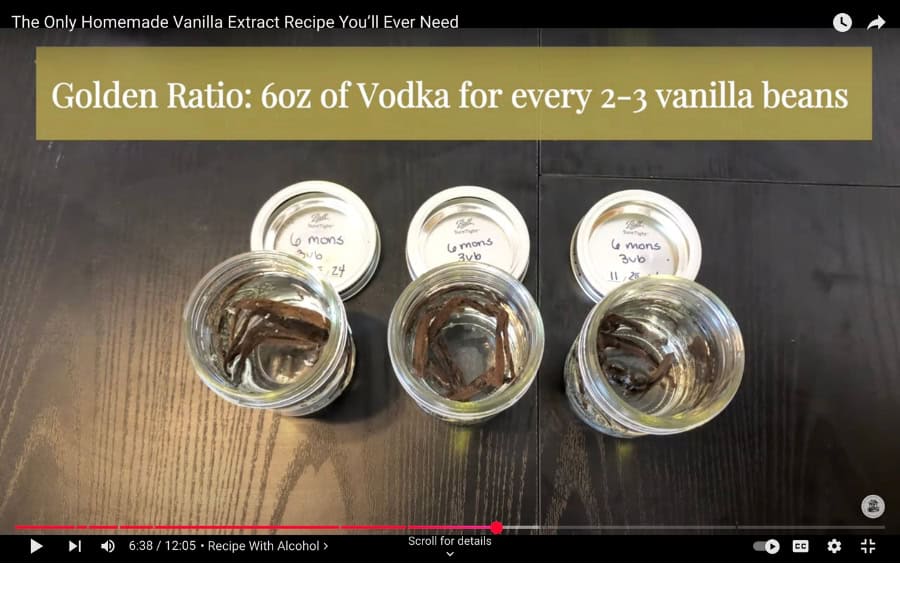
- 6 oz vodka (80 proof)
- 2–3 vanilla beans (depending on infusion time)
While you don’t need expensive vodka, avoid flavored or low-proof varieties.
Tools:
- Glass jars with lids (preferably 4–6 oz size)
- Cotton cloths to help seal the extract
- Knife (for splitting the vanilla beans)
Prep Time:
- 5 minutes (active)
- 6+ months (infusion time)
Instructions:
- Prepare the Vanilla Beans:
- Split the vanilla beans lengthwise with a knife to expose the seeds. If your jar is short, cut the beans into smaller pieces to fit.
- Add Vodka:
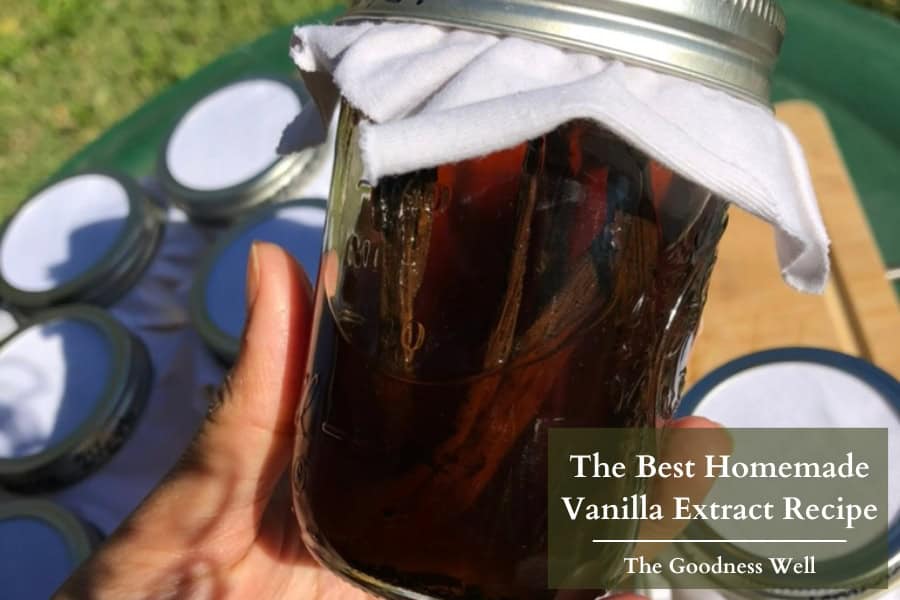
- Place 2–3 vanilla beans into each glass jar. Pour in 6 oz of vodka, ensuring the beans are fully submerged.
- Seal and Store:
- Close the jar tightly. Store it in a cool, dark place for at least 6 months (longer for a stronger flavor).
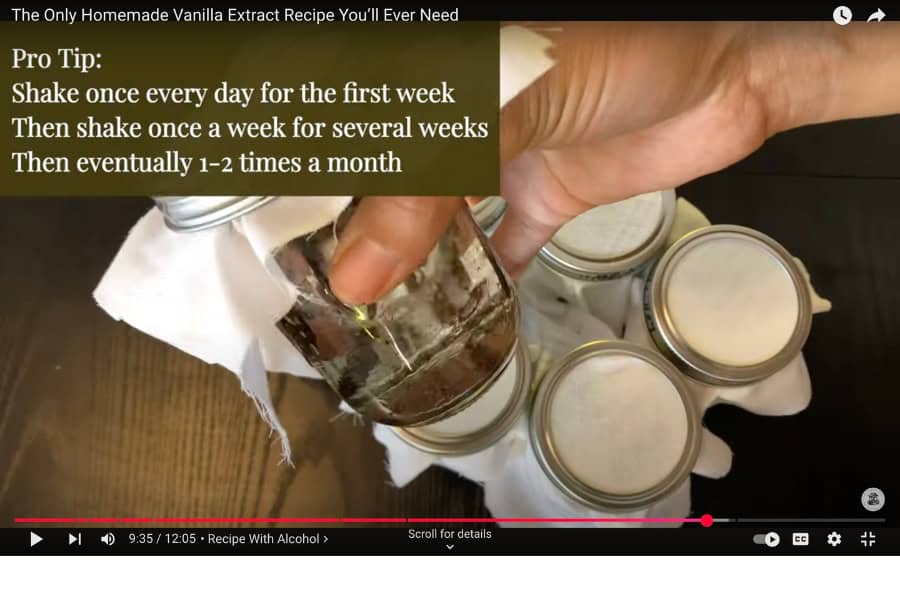
- Shake Regularly:
- Shake the jar every 1–2 weeks to help release the flavors.
The longer you wait, the richer the flavor. Aim for at least 6 months, but 9–12 months is even better.
Non-Alcoholic Vanilla Extract Recipe
Ingredients:
- 16 oz food-grade glycerin
- 6 oz water
- 5–6 vanilla beans
Glycerin adds a natural sweetness to the extract, so it’s perfect for desserts and no-bake recipes. The glycerin-based extract is more syrupy than the alcohol version, making it great for frostings and beverages.
Tools:
- Pint-sized (16 oz) glass jar with a lid
- Knife (for splitting the beans)
- Funnel (optional)
Prep Time:
- 5 minutes (active)
- 6–12 months (infusion time)
Instructions
- Prepare the Vanilla Beans:
- Split the vanilla beans lengthwise with a knife to expose the seeds. Cut the beans into smaller pieces if necessary.
- Combine Glycerin and Water:
- In the glass jar, mix 16 oz of glycerin with 6 oz of water.
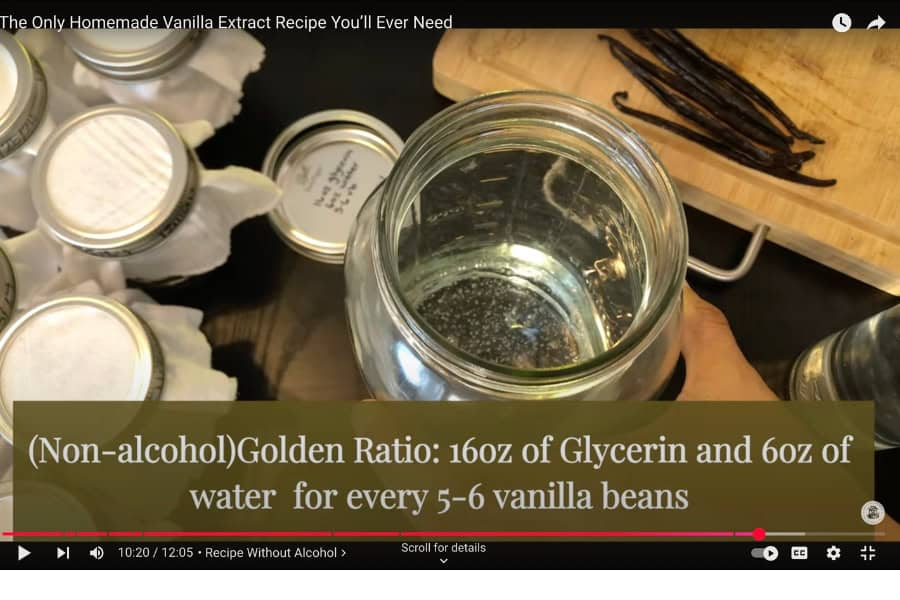
- Add the Vanilla Beans:
- Place 5–6 vanilla beans into the jar. Ensure they are fully submerged.
- Seal and Store:
- Close the jar tightly. Store it in a cool, dark place for at least 6 months (up to 12 months for a stronger flavor).
- Shake Regularly:
- Shake the jar every 1–2 weeks to help extract the flavors.
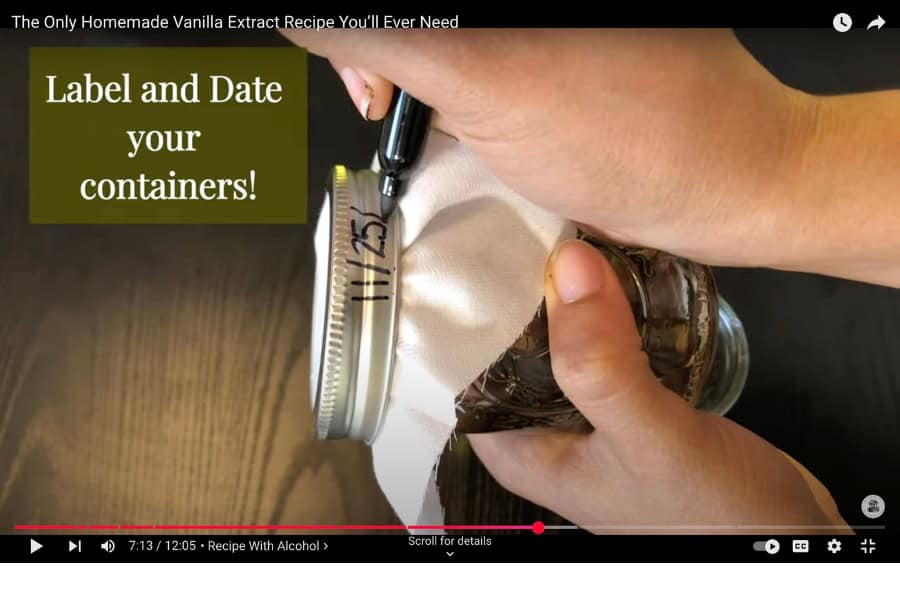
Pro Tip: Include the date you started the infusion so you know when it’s ready.
Cost Breakdown
Alcohol-Based Vanilla Extract:
- Vodka: $8.99 per 750 mL (25.4 oz) = $0.35 per oz
- Vanilla Beans: $0.69 each
- Cost per 6oz batch: $3.64
- Savings: Store-bought vanilla extract costs $15–$25 per 4 oz, so you save up to $17.36 per batch!
Non-Alcoholic Vanilla Extract:
- Glycerin: ~$10 for 16 oz
- Vanilla Beans: $0.69 each
- Cost per 22oz batch: ~$13.45
- Savings: Non-alcoholic vanilla extract costs $5–$7 per ounce in stores, so you save up to $121 per batch!
Don’t forget to watch my YouTube video for a step-by-step tutorial on both recipes. I’ll show you the process and results and how to customize your extract to fit your needs.
Whether you choose the alcohol-based or non-alcoholic version, homemade vanilla extract is a fun, cost-effective way to upgrade your baking and cooking.
Let me know in the comments which one you’re making—and share your results!