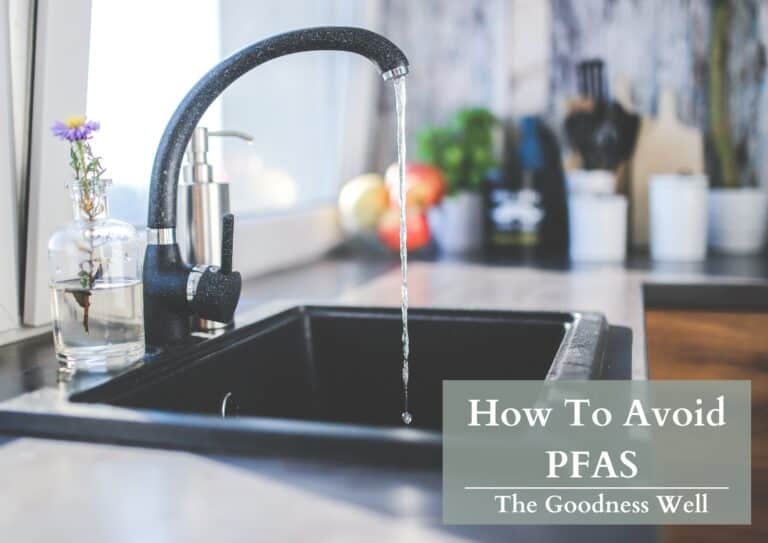
Creating Clean Air & Safe Water at Home: 5 Essential Steps

When trying to non-toxify your home, there are two very important elements to address:
The air you breathe and the water you drink.
While many focus on other concerns like cleaning products or personal care items, some of the most serious health risks in our homes are actually invisible – from radon gas to lead in aging pipes.
That’s why in this article we break down the process of tackling these issues into 5 manageable steps that we also took ourselves when moving into our home.
Whether you’re just beginning your non-toxic home journey or looking to create a healthier living space, these steps will help you create a safer environment for you and your family.
We are reader-supported. So some links in this post may be affiliate links, which means we may earn a small commission if you make a purchase. Learn more
You might be asking..
Do I really need to be concerned about my home water and air?

Not concerned, but cautious, and for a few reasons:
- Waterborne diseases affect over 7 million people in the U.S. every year and cost our healthcare system over $3 billion.
- Beyond bacteria, common contaminants like lead, PFAS, and disinfection byproducts can cause long-term health issues, even at levels too low to taste or smell, and can enter water systems after leaving treatment centers through aging pipes and infrastructure.
- The EPA estimates that Americans spend approximately 90% of their time indoors, where air pollutants can be 2-5 times higher than outdoor levels.
- Indoor air quality studies have linked common pollutants (like mold, formaldehyde from furniture, asbestos from building materials, radon, etc.) to a range of health issues, from respiratory diseases and asthma to heart disease, cognitive problems, and even cancer.
This isn’t meant to alarm you but rather emphasize why taking simple preventive steps now can protect your family’s health in the long run.
The good news?
Most water and air quality issues can be taken care of without too much hassle.
Before we get started, here are a few things to know:
- Understand that some steps may require professional help
- Be prepared to make initial investments in testing and basic equipment
- Remember that creating a truly healthy home is a journey, not a race
Step 1: Test for Critical Hidden Dangers

Every year, thousands of Americans face serious health risks from two invisible threats in their homes: radon gas and carbon monoxide.
While many homeowners focus on issues like mold or dust, these odorless, colorless gases are far more dangerous.
Don’t worry if you’re not familiar with these- many people aren’t.
Let’s break down what they are, why they matter, and how to test and monitor them (it’s easy!)
Why & How to Test for Radon
Radon is a radioactive gas that silently seeps into homes through foundation cracks and can become trapped inside.
As the second leading cause of lung cancer after smoking, it’s pretty important to take notice of.
The EPA’s radon map below shows potential risk zones across the country:

- Zone 1 (Red): Highest potential (>4 pCi/L)
- Zone 2 (Orange): Moderate potential (2-4 pCi/L)
- Zone 3 (Yellow): Low potential (<2 pCi/L)
There is something important to know here:
Your specific location on this map doesn’t guarantee your home is safe from Radon.
Radon levels can vary between homes due to:
- Different soil compositions
- Various foundation types
- Home construction methods
- Ventilation differences
The highest concentrations are typically in basements and ground floors.
Testing for Radon:
Purchase a test kit ($15-30) (this is the one we used) from your local hardware store or online and follow the instructions.
This is ideal when moving into a new home or can be done if you have never done a test.
Why & How to Monitor Carbon Monoxide
While most homes have smoke detectors, many don’t have carbon monoxide (CO) detectors (most of our apartments/homes here in Texas don’t, including ours when we moved in).
While all homes should have carbon monoxide detectors, it is especially important in homes with:
- Fuel-burning appliances
- Fireplaces or wood stoves
- Attached garages
- Gas-powered generators or heaters
- Older heating systems
- Basements or poorly ventilated spaces
CO can be deadly because it can:
- Build up quickly in poorly ventilated spaces
- Cause symptoms easily confused with flu
- Become lethal before you realize there’s a problem
CO Safety Steps:
- Install CO detectors:
- On every level of your home
- Outside all sleeping areas
- At least 5 feet above the floor
- *we have a small, one story home and installed one right in our living room- the center of the home
- Replace batteries twice yearly
- Replace units every 5-7 years
Step 1 Action Plan
While these tests might seem like an extra expense, they’re crucial small investments that can mitigate harm with a few easy steps.
Step 2: Test and Understand Your Water Quality
When it comes to water safety, what you can’t see CAN harm you. Recent EPA data shows about 9.2 million homes still have lead service lines, but lead is just one of many potential contaminants.
Let’s understand what could be lurking in your water and how to test for it.
Common Water Contaminants to Test For:
Heavy Metals

- Lead: Not just from service lines, but old solder and fixtures
- Copper: Can leach from corroding pipes
- Arsenic: Naturally occurring in some groundwater
- Mercury: From industrial pollution
Disinfection Issues
These can form when treatment chemicals react with organic matter:
- Chlorine and chloramine (used to kill bacteria)
- Trihalomethanes (THMs)
- Haloacetic Acids (HAAs) Both THMs and HAAs are linked to serious health concerns
Other Contaminants
- PFAS (“forever chemicals”) from industrial processes (Watch the movie “Dark Waters”)
- Microplastics from plastic pollution
- Pharmaceutical residues
- Hormones from medications and agricultural runoff
- Nitrates from fertilizer runoff

How to Test Water
Water Testing Options:
These are the best and most practical options to test your water at home:
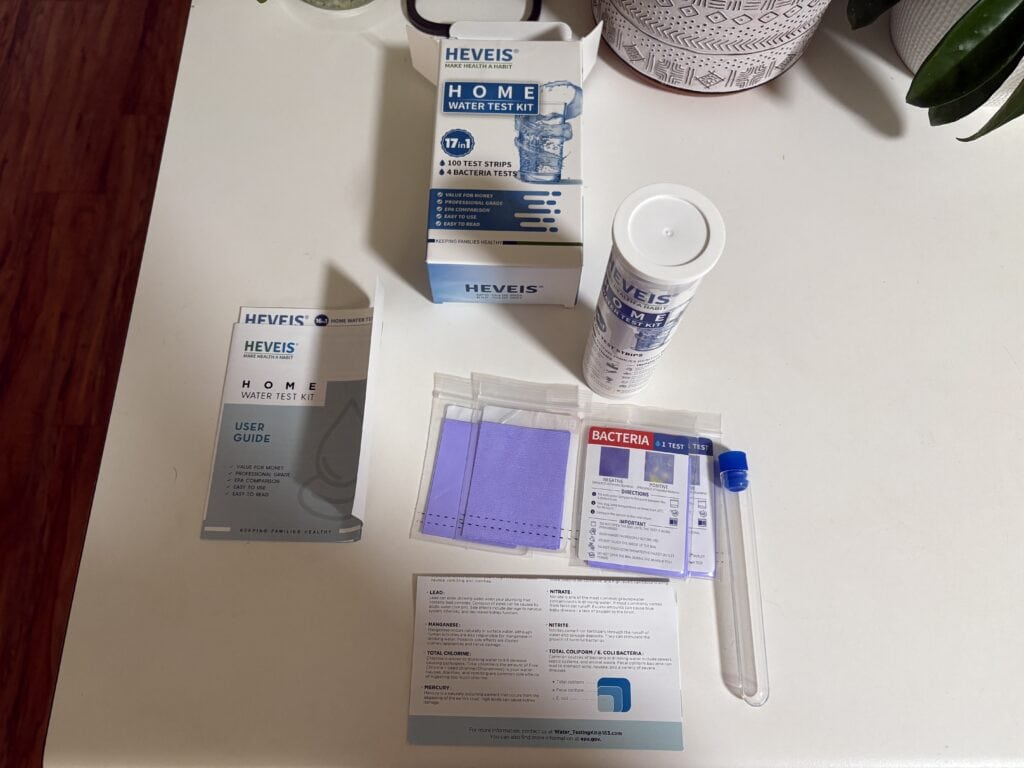
- DIY Home Test Kits (what we used)
- Cost: Basic & cheap
- Accuracy: Low to moderate
- Mail-In Lab Testing
- Cost: More expensive
- Accuracy: Very high
- Digital Water Monitors (we also used this)
- Cost: Basic & Cheap
- Accuracy: Moderate (good for tracking but not identifying specific contaminants)
- Free City Water Reports
- Cost: Free
- Accuracy: Moderate (shows municipal water quality but not home-specific contamination)
- Usually available on city websites
Well Water
Private well owners need more comprehensive testing
- No regulatory oversight means testing is your responsibility
- Test annually at minimum
- Consider seasonal testing if quality varies
- Test after major weather events or nearby construction
Step 2 Action Plan
Step 3: Water Filtering
Whether you want to test your water or not, we always recommend filtering your water.
Here’s how to do it.
While a whole-home reverse osmosis system would be ideal, I’ll show you what we’ve done in my own home to achieve great water quality without breaking the bank.
This setup works great and offers the best balance of effectiveness and cost.
Water Filtering Options:
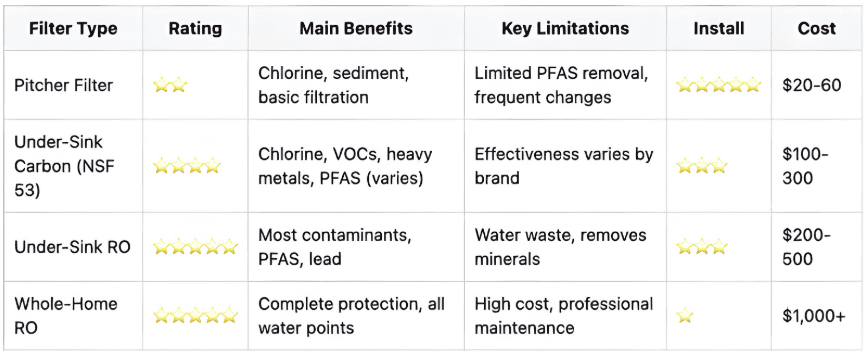
Recommended Setup
Kitchen Setup
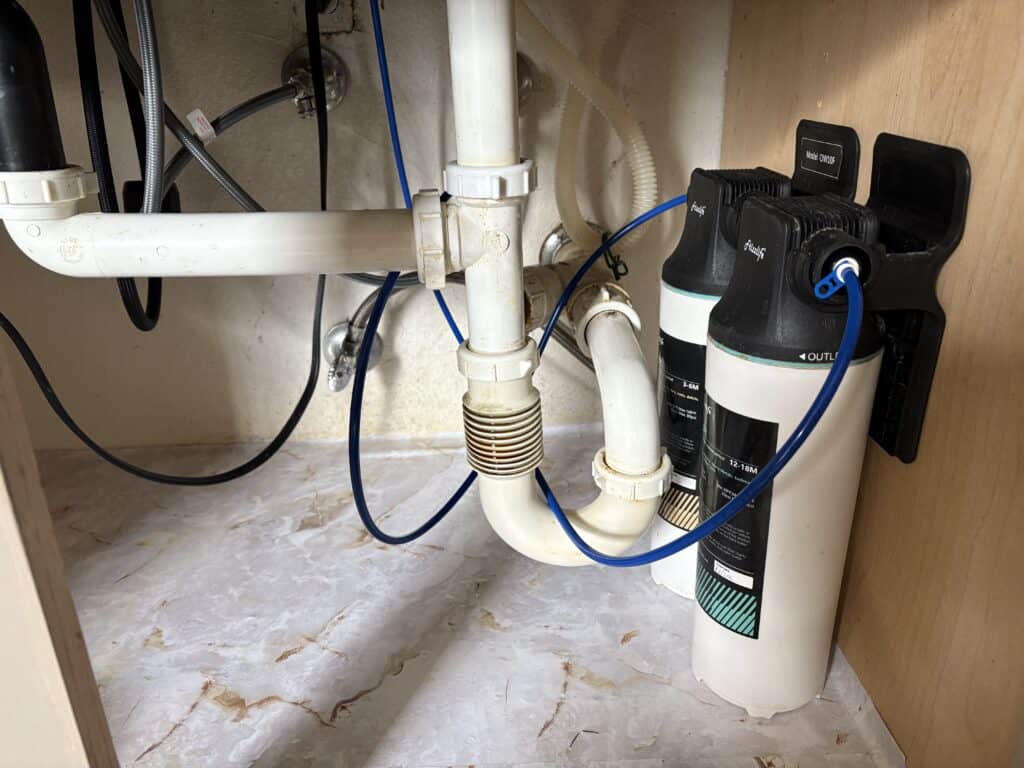
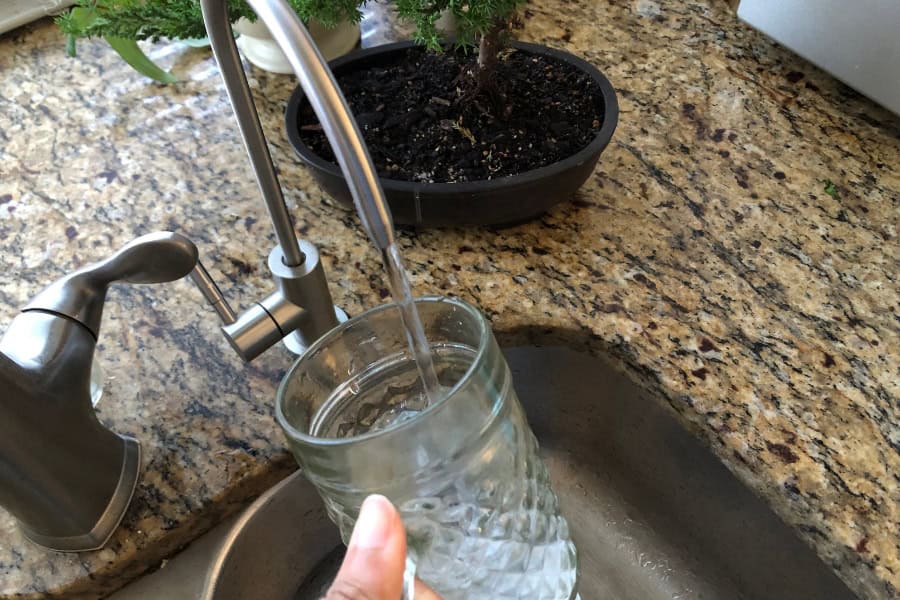
I installed an under-sink carbon filter (NSF 53 certified) in our kitchen, which is where we get our drinking and cooking water.
After researching a bunch of different options, I found this $140 system effectively removes chlorine, lead, PFAS, VOCs, heavy metals, and doesn’t involve the wasting of much plastic when replacing filters.
The installation was straightforward, and the water tastes much better!
Bathroom Setup
For our main bathroom, I used the same under-sink carbon filter setup (but the direct connect option).
Faucet Filters:
- Direct-Connect Option – Installs directly to your existing faucet (what we used for bathroom)
- Separate Faucet Option – Includes an additional dedicated faucet for filtered water, keeping it separate from unfiltered tap water. (what we used for kitchen)
*we use the direct-connect filter in the bathroom because there’s no extra hole for an additional faucet. Kitchen sinks, however, usually have a pre-drilled hole (for soap dispensers or sprayers), making it easy to install a separate filtered water faucet without modifying the sink. You can certainly use the direct connect filter in the kitchen if you wish.
Shower Setup
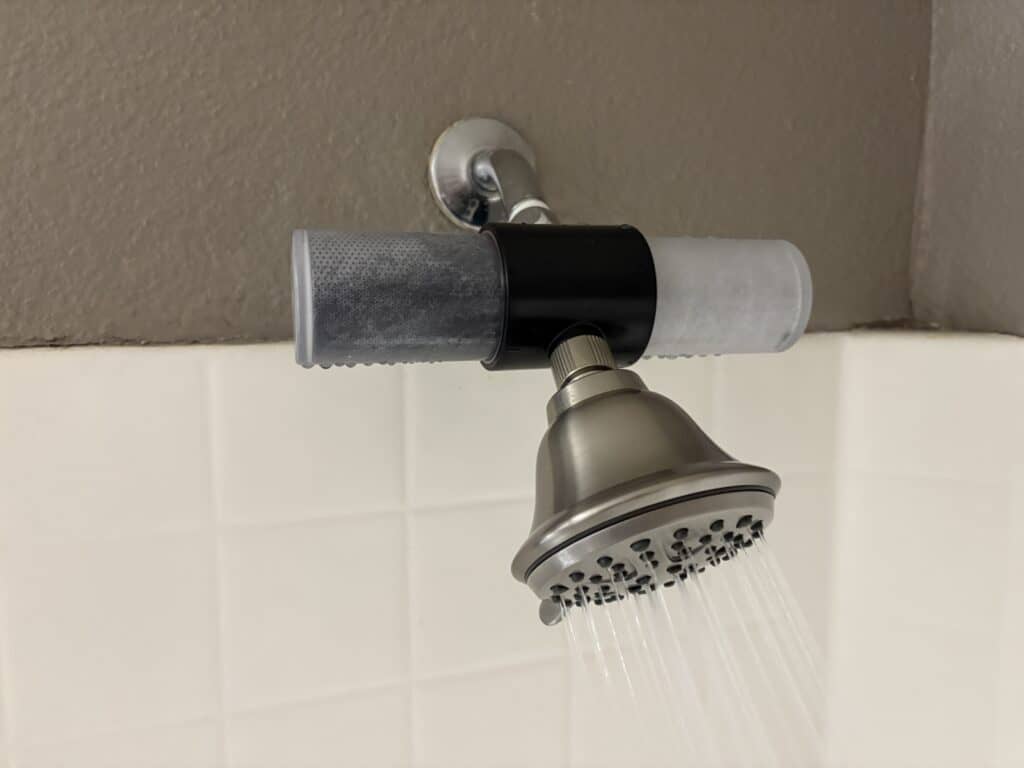
The final piece of our setup is the Weddell Duo Shower Filter ($89.99).
It’s the best shower filter out there and removes chlorine, PFAS (which can be absorbed through the skin), and particulates.
It was super easy to install and gives us even extra piece of mind by covering all bases of water exposure—whether we’re drinking it, cooking with it, or showering in it.
Total Investment: $369.99
Why I Chose This Setup:
- Targets the most important water contact points in our home
- Offers nearly whole-house protection at a fraction of the cost
- Requires minimal maintenance (just regular filter changes)
- Saves money on buying water
Additional Benefits
Money-Saving Benefits:
While it might seem like a bit costly up front, getting these filters not only keeps your water clean but saves you money in the long run.
- A family of four spending $20/week on bottled water spends ~$1,040 annually
- Quality filters cost ~$370 upfront + ~$100/year in replacements
- Potential first-year savings: ~$570
- Following years’ savings: ~$940 annually
Environmental Impact:
Another plus is that you reduce all of the plastic waste that comes with using water bottles regularly
- Average American uses 167 plastic water bottles yearly
- Family of four = 668 bottles
- Your filter setup eliminates this plastic waste
- Reduces carbon footprint from bottle manufacturing and transport
Installation Tips From My Experience:
- Start with the kitchen filter – it’s your most important point
- Add the bathroom filter next
- Finally, install the shower filter
- Keep spare filters on hand
- Set calendar reminders for maintenance
Other Options to Consider:
- Whole-home RO system: Great but high cost ($1,000-4,000+)
- Single-point RO: Effective but wastes more water and more expensive
- Basic pitcher filters: Too limited
Clean Water Tips
Safe and clean water isn’t just about filtering, it’s about how you use it as well.
Follow these tips below to help further maintain the purity of your drinking and cooking water.
Hot Water Tips:
- Never use hot tap water for drinking or cooking
- Hot water dissolves contaminants more easily from pipes (especially lead)
- Always start with cold water, then heat it on the stove or in kettle (if you don’t have a filter)
- This is especially important for baby formula and cooking
Extra Water Safety Tips:
- Run tap 15-30 seconds before using after long periods of non-use
- Clean faucet aerators monthly
- Replace filters on schedule (set reminders)
- Use cold filtered water for pets too
- Consider a filter for garden hose if watering edible plants
Storage Tips:
- Store filtered water in glass containers, not plastic
- Keep no longer than 1 week in fridge
- Clean storage containers regularly
- Let cold water run briefly before filling containers
Step 3 Action Plan
Step 4: Install Air Quality Basics

After taking care of those hidden threats and your water quality, it’s time to tackle your home’s air quality.
While radon might be the most serious air quality threat, there’s other invisible air pollutants we need to address: VOCs (Volatile Organic Compounds) and other indoor air pollutants.
Understanding VOCs
These airborne chemicals are released from many common household items and can cause both immediate and long-term health effects.
Think of VOCs as invisible gases that slowly release from products in your home.
That “new furniture smell” or fresh paint odor?
Those are VOCs, and they can linger long after the smell is gone.
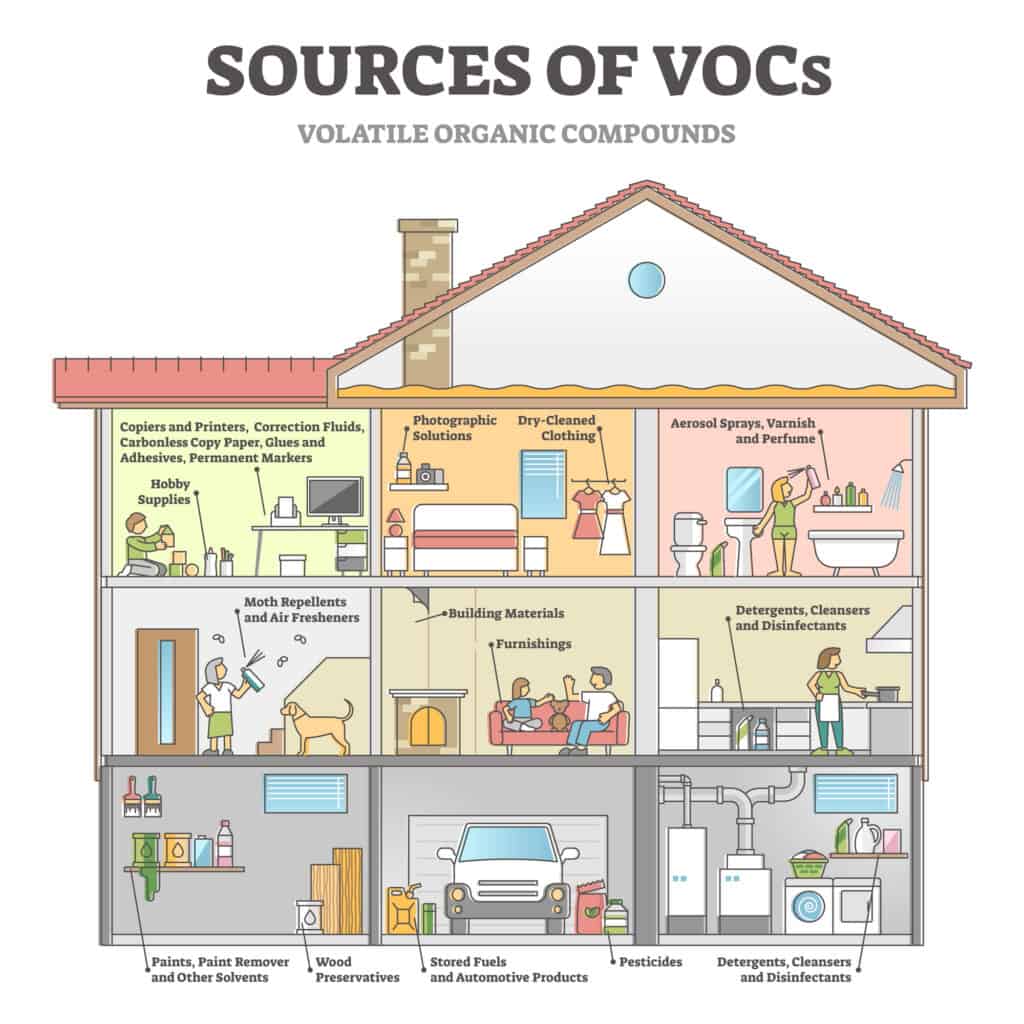
Common VOC Sources in Your Home:
- New furniture and carpeting
- Paint and finishes
- Cleaning products
- Air fresheners
- Conventional Candles
- Pressed wood products
- Building materials
- Craft supplies
Air Quality Solutions

Air Purification
Your first line of defense should be proper air purification. While natural ventilation helps, a good air purifier works 24/7 to clean your air. Look for:
- True HEPA filtration
- Activated carbon for VOC removal
- Proper sizing for your room
- Energy Star certification if possible
This is especially important for those of you will allergies, chemical sensitivities, and pets.
Air Filter Basics
Don’t forget about replacing those air filters! They are a crucial part of keeping healthy indoor air quality.

Replacement Schedule:
- Basic 1-inch filters: Every 1-3 months
- High-end pleated filters: Every 3-6 months
- Homes with pets need more frequent changes
- Check monthly during heavy use seasons
Natural Solutions & Source Control
The best way to deal with pollutants is to avoid bringing them into your home in the first place. Instead of artificial products, choose natural alternatives that can help clean your air:
- Remove artificial air fresheners and replace with:
- Air-purifying plants
- Non toxic candles
- Salt lamps
- Natural essential oil diffusers
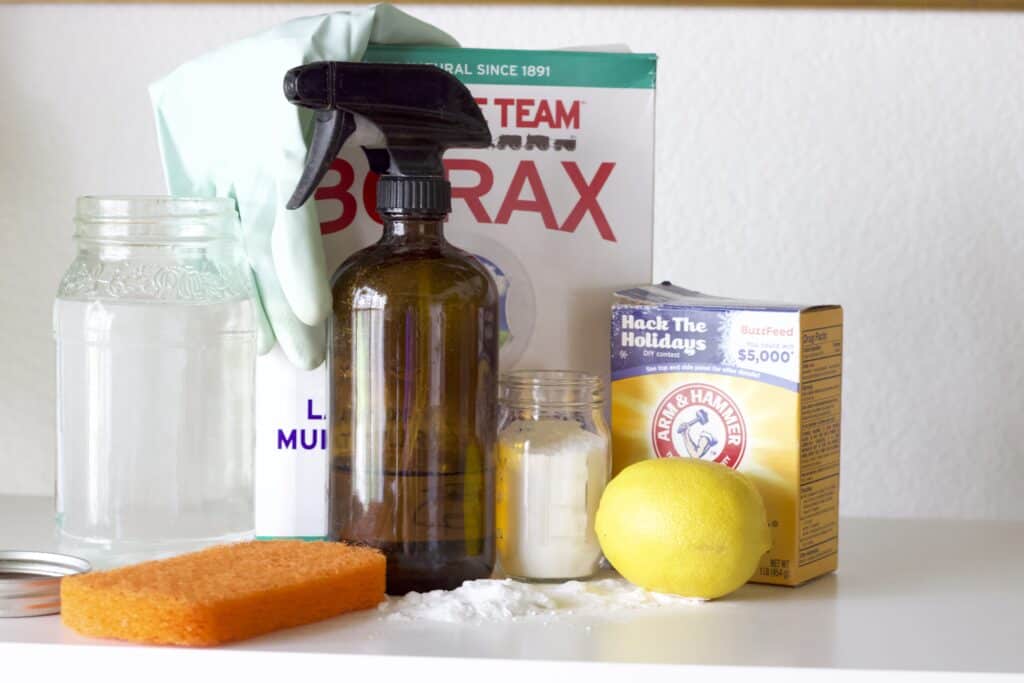
- Switch to natural cleaning products
- Choose low-VOC paints and finishes
- Store any necessary chemicals in garage or outdoor shed
Maintaining Air Quality
Creating Your Maintenance Schedule Regular maintenance is crucial for maintaining good air quality. Here’s a simple schedule to follow:
- Daily: Run air purifiers continuously
- Weekly: Vacuum with HEPA filter
- Monthly: Clean exhaust fan covers
- Seasonally: Check and clean window screens
Consider a Humidifier
Maintaining proper indoor humidity (30-50%) can be just as important as air filtration. Poor humidity levels can lead to mold, respiratory issues, and home damage.
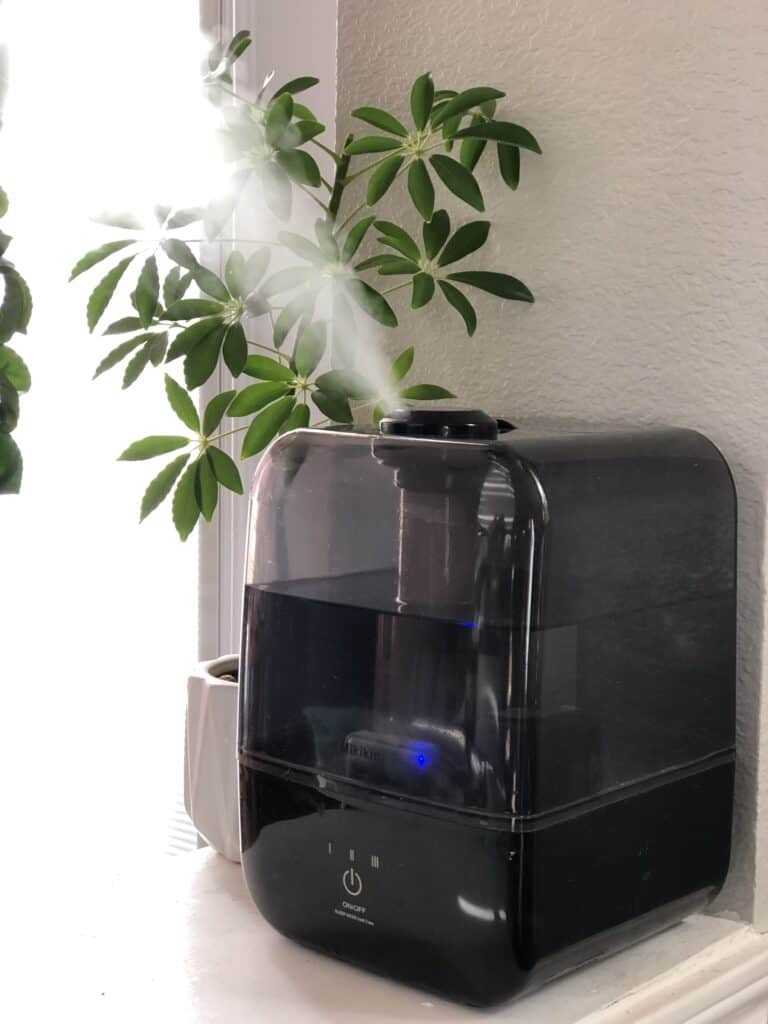
From a family that deals with dry skin, and allergies, and a kiddo that also deals with nose bleeds at night, keeping a humidifier on hand has been super helpful for us.
A humidifier can help many things like:
Health Benefits:
- Prevent dry skin, chapped lips, and nosebleeds
- Help you sleep better by keeping nasal passages moist
- Reduce allergy symptoms and respiratory irritation
- Help sore throats and dry coughs
Home Benefits:
- Stop static electricity shocks
- Protect wooden furniture from cracking
- Keep houseplants healthy
- Prevent damage to electronics from static buildup
Clean your humidifier regularly – daily water changes and weekly cleaning will keep it running safely and effectively without spreading bacteria.
Step 4 Action Plan
Step 5: Special Situations
Most homes have unique challenges that require extra attention.
While the previous steps provide a solid foundation for improving your home’s air and water quality, certain situations need specific approaches.
Let’s look at the most common special circumstances you might come across.
Older Homes (Pre-1986)
If you live in an older home, it’s important to be extra cautious.
Homes built before 1986 often have lead pipes or lead solder, and many contain asbestos in their insulation or tiles.
Consider the following:
- Get professional lead and asbestos testing
- Inspect and potentially upgrade HVAC systems
- Test water specifically for lead contamination
- Check insulation and tile conditions
Gas Stoves
While gas stoves are great for cooking, they can release harmful pollutants into your home’s air.
Take these precautions:
- Install and regularly check carbon monoxide detectors
- Always use exhaust fans while cooking
- Keep windows open when possible while cooking
- Consider an air quality monitor for the kitchen
Basements
Basements have unique challenges because they’re partially underground and prone to moisture issues.
They also typically have the highest radon levels in the home and require special attention:
- Conduct regular radon testing
- Monitor humidity levels closely
- Check walls and floors for water seepage
- Use dehumidifiers during damp seasons
Attached Garages and High-Traffic Areas
These can introduce more pollutants into your home.
For attached garages, never idle vehicles inside and ensure proper sealing between the garage and living space.
For homes near busy streets, keep windows closed during peak traffic hours and consider keeping your air purifier running.
Step 5 Action Plan
Summary: Action Steps
Week 1: Critical Safety
- Order a radon test kit
- Install CO detectors on every floor
- Request water quality report from utility company or view on city website
- Schedule water testing if you have a well
Week 2: Water Solutions
- Install kitchen sink filter
- Add bathroom sink filter
- Install shower filter
- Set up filter replacement calendar
Week 3: Air Quality
- Install HEPA air purifier
- Check and upgrade HVAC filters
- Ditch toxic cleaners and use natural options instead
- If you have carpet, use a vacuum with a HEPA filter regularly
- Remove artificial air fresheners and choose non toxic options
- Consider a humidifier
Additional Tasks:
- Document maintenance schedules
- Set reminders for filter changes
- Keep spare filters on hand
- Test water seasonally if needed
Start with the safety tips in Week 1 as they’re the most important. The rest can be implemented gradually as your budget allows.